List of shortcuts
Photoshop Tool Basics
---------------------------------
Introduction to Photoshop!
PART 1:
When opening photoshop, always remember to set your dimensions first! For future projects, I will give the dimensions first and foremost. You will need the following settings for your Assignment due Monday:
Important tools to remember:

- Move tool (V key): For moving objects around the workspace.
- Rectangular Marquee Tool (M Key): For making selections.
- Hold "Option" to remove parts of your selection.
- Hold "Shift" to add parts to your selection.
- Brush Tool (B key): For general mark making in photoshop.
- Eraser Key (E key): For erasing parts of your layer.
- Paint Bucket Tool (G key): For filling large parts of your image, or filling an entire selection once.
Hotkeys and functions to know:
To resize objects:
- Go to EDIT --> Free Transform (Command + T)
- To resize objects with uniform scale, hold SHIFT when scaling your objects!
COPYING, PASTING, and DUPLICATING.
- Copy: Command + C
- Paste: Command + V
- For rapid duplication of an object:
- 1) Select the layer of the object you want to move, or if working with multiple objects, select them with the rectangular marquee tool.
- 2) Select the move tool. (V)
- 3) Hold option.
- 4) You can now click and drag your option to create multiple ones on the same layer!
UNDO, STEP BACKWARD, AND STEP FORWARD
- Undo: Command + Z
- NOTE! If you need to undo further, Photoshop has a function called "Step Backward," that you can use. You can undo more than 20 times this way, but the total amount of undos you are allowed is finite.
- To use STEP BACKWARD, hold COMMAND and OPTION and press z.
- To do the opposite and STEP FORWARD, hold COMMAND and SHIFT and press Z.
WORKING WITH LAYERS:
- To change the opacity:
- Under the LAYERS tab, click the arrow next to "OPACITY," and adjust the number as needed. 100 is equal to a fully solid image, whereas 0 is completely transparent.
- To move layers up and down, click on the specific layer, and move as needed. Layers on top are in the foreground, and layers on the bottom are in the background!
COLOR AND SWATCHES:
- Clicking the large squares in the color tab will open up a COLOR PICKER, that will let you choose from a wide variety of colors. You can also click anywhere in the little strip at the bottom of the color tab to choose colors. The SWATCHES tab gives you a set of basic colors for editing.

When using reference materials, it may be easier to make note of the lighting of an image by using the posterization feature. Posterize simplifies the lighting in an image into cells of color.
1) Go to IMAGE -----> ADJUSTMENTS ------> POSTERIZE
2) Drag the slider to select the number of levels that works best for you.

1)Go to FILE -----> SAVE AS

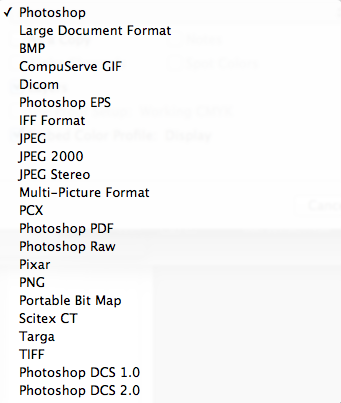
Note: Save your file as both a photoshop file, and a .PNG file for the web! (See below)
---------------------
PART 2:
List of tools and reminders for what we're covering: (Hotkeys or shortcuts to them are in Parentheses)
- Navigator Tab: A shortcut for viewing a thumbnail of your work.
- Hand Tool (Space): Used for moving around your image when zoomed in.
- Rulers and Guides: Good for making precise measurements.
- Show Rulers: ("Command + R" , or "View ------> Rulers")
- Rotate view tool: (R) Lets you turn your image like paper!
- Guides: (View --------> New Guide)
- Show Grid: ("Command + ' " or "View --------> Show --------> Guides")
- Delete Guides: (View -------> Clear Guides)

- Crop tool: C Used for cropping image.
- Brushes (B) Used for drawing. Can change brush size and opacity, can also create brushes too!
- Changing brush size: ("[" for smaller size, and "]" for larger)
- Other Marquee Tools (selection tools) at your Disposal: (Can switch between rectangle and square tools by holding (SHIFT and pressing M)
- Lasso Tool (L ): Used for drawing a circle around your object and selecting it.
- Polygonal Lasso Tool: Lets you paint an edged lasso.
- Magnetic Lasso Tool: Snaps to objects in your layers.
- Quick Selection Tool : Lets you paint a selection.
- Pen Tool: Used for drawing shapes, and making complex selections.
- Can select parts of your path with the PATH SELECTION TOOL (A).
- Clone Stamp Tool: (S) Used for making copies of objects.
- 1. Select cloning tool.
- 2. Hold option to select what you want to clone.
- 3. Let go of option, and paint with your tool!
- Type Tool (T): Used for adding type to your work.
- Making Large-Scale Image Adjustments:
- Blur and Sharpen Tool: Good for altering the focus of an image.

------------------
Image -----> Adjustments
Each adjustment type modifies your image in various ways! Here are the main ones that may be helpful in your next project:
Brightness and Contrast

Hue and Saturation

Color Balance

Making Small-Scale Image Adjustments:
- Use the marquee tools to select a small spot to change. Then use the ADJUSTMENT TABS to change them.
Experimenting with your Image Adjustments
- Use the adjustment layers to modify your image in sections. You can turn these off if you need to. This works for NON-DESTRUCTIVE IMAGE ADJUSTMENTS.
No comments:
Post a Comment