Apologies for posting this later than 1. I ran into some issues where the server refused to save some students' work under their individual accounts. I've talked with Jeff about it, and if any other problems happen and we're somehow unable to save work, I will let you know.
Below is a review of everything we covered today, important hotkeys to remember, and the assignments we went through in class. I know photoshop is a very robust program, and most of you are learning it for the first time. So it is okay to still have questions comments or concerns about what we covered. For reference, I included images below. If you have any questions, post a comment on the blog below, or contact me at mshaw@mca.edu. I will answer any that you may have!
List of shortcuts
Photoshop Tool Basics
---------------------------------
Introduction to Photoshop!
When opening photoshop, always remember to set your dimensions first! For future projects, I will give the dimensions first and foremost. You will need the following settings for your Assignment due Monday:
Important tools to remember:

- Move tool (V key): For moving objects around the workspace.
- Rectangular Marquee Tool (M Key): For making selections.
- Hold "Option" to remove parts of your selection.
- Hold "Shift" to add parts to your selection.
- Brush Tool (B key): For general mark making in photoshop.
- Eraser Key (E key): For erasing parts of your layer.
- Paint Bucket Tool (G key): For filling large parts of your image, or filling an entire selection once.
Hotkeys and functions to know:
To resize objects:
- Go to EDIT --> Free Transform (Command + T)
- To resize objects with uniform scale, hold SHIFT when scaling your objects!
COPYING, PASTING, and DUPLICATING.
- Copy: Command + C
- Paste: Command + V
- For rapid duplication of an object:
- 1) Select the layer of the object you want to move, or if working with multiple objects, select them with the rectangular marquee tool.
- 2) Select the move tool. (V)
- 3) Hold option.
- 4) You can now click and drag your option to create multiple ones on the same layer!
UNDO, STEP BACKWARD, AND STEP FORWARD
- Undo: Command + Z
- NOTE! If you need to undo further, Photoshop has a function called "Step Backward," that you can use. You can undo more than 20 times this way, but the total amount of undos you are allowed is finite.
- To use STEP BACKWARD, hold COMMAND and OPTION and press z.
- To do the opposite and STEP FORWARD, hold COMMAND and SHIFT and press Z.
WORKING WITH LAYERS:
- To change the opacity:
- Under the LAYERS tab, click the arrow next to "OPACITY," and adjust the number as needed. 100 is equal to a fully solid image, whereas 0 is completely transparent.
- To move layers up and down, click on the specific layer, and move as needed. Layers on top are in the foreground, and layers on the bottom are in the background!
COLOR AND SWATCHES:
- Clicking the large squares in the color tab will open up a COLOR PICKER, that will let you choose from a wide variety of colors. You can also click anywhere in the little strip at the bottom of the color tab to choose colors. The SWATCHES tab gives you a set of basic colors for editing.

When using reference materials, it may be easier to make note of the lighting of an image by using the posterization feature. Posterize simplifies the lighting in an image into cells of color.
1) Go to IMAGE -----> ADJUSTMENTS ------> POSTERIZE
2) Drag the slider to select the number of levels that works best for you.

1)Go to FILE -----> SAVE AS

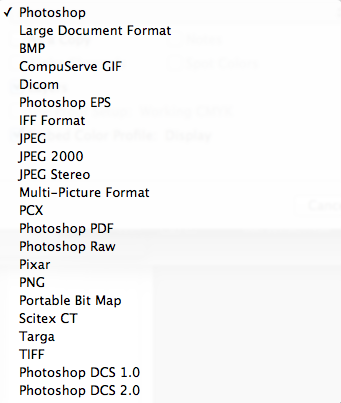
Note: Save your file as both a photoshop file, and a .PNG file for the web! (See below)
----------------------------------------------------------------------------
ASSIGNMENT DUE MONDAY!
ASSIGNMENT PART 1:
1) Take two of three images you brought to class. Using the RECTANGULAR MARQUEE TOOL, divide those images as indicated:
A) Subject matter, by what you see first, second, third, and so on. Use any color you choose.
B) By basic lighting values. Black for darkest. Gray for mid tones. White for highlights.
2) Upload the images to your blog. On your blog, write a short paragraph explaining the visual hierarchy in each image. Where does your eye travel first? Second? Third? Why? Is it because of the lighting? The size of the objects
Patterns?
ASSIGNMENT PART 2:
1) Use the "Photo Booth" feature on the picture to take a photo of yourself! Then, open a new Photoshop file with the following dimensions:
- Width: 11 inches
- Height: 8.5 Inches
- Resolution: 300 Pixels/Inch
- RGB Color: 8 bit

3) Scale your photo (Command T) to the size of the page.
4) Use the skills learned in class to create a photo with personality! Think about how patterns and rectangles of different sizes can be compiled to make a compelling image!
5) When finished, save the image as a .png. Upload it to your blog in a post, along with a paragraph description of your mark making choices. What kind of expression or emotion were you trying to convey? How does your strokes help create that image?
I know we covered a lot today. These tools will serve as the foundation for the skills you build in every class going forward.
Again, if you have any questions, post a comment on the blog below, or contact me at mshaw@mca.edu. I will answer any that you may have!
No comments:
Post a Comment