Class FD 170D - Digital Foundations
Location - Mac Lab 1
Michael Shaw: Adjunct Professor
Contact: mshaw@mca.edu
Office Hours: (Location and time TBA) Mon, Tue, Wed, Thur,: 6:55 - 8, or 3:35-4 (1 hour before or after class; will be finalized by end of first week.)
COURSE DESCRIPTION:
This class is an introduction to the basics of understanding digital procedures and improving one's visual skills and concept development through the use of digital production tools. This will include research and fundamental visual design principles connected with a non-traditional way of working via digital methods.
COURSE OUTCOME OBJECTIVES:
To familiarize students with the methods of digital production tools while developing their visual design skills.
Reinforce fundamental visual design principles.
Build a stronger digital basics skill set.
To be able to use the digital methods to develop layout compositions.
Develop an understanding of digital terminology and vocabulary.
PROFESSIONAL PRACTICE OUTCOMES:
- Students will demonstrate the ability to write an artist statement.
- Students will demonstrate the ability to document their work.
- Students will demonstrate the ability to exhibit work beyond the classroom via the web.
- Students will demonstrate the ability to research to stay current in their field.
METHODS:
- Overview of materials and methods used, including utilizing traditional visual design principles, Mac OS. For example: visual topics, including symmetry, line art, tonal scale, elements of motion, and more in the making of art processes.
- Class demonstrations, use of software and hardware tools.
- Class discussions and critiques.
- You will be required to record and keep notes.
MATERIALS/SUPPLIES:
Sketchbook/Notebook - for taking notes and keeping records. (Can take notes digitally if need be.)
Thumb Drive or External Hard Drive - for saving and backing up files
Printer Card ($10 - Purchase in the business office)
COPYRIGHT:
You must receive copyright permission for all non-public domain media used in projects. (Music, film footage, etc.) Public domain material can be found at http://www.publicdomain.org/ and http://www.creativecommons.org. Visit American University's Center for Social Media Website for detailed information regarding the difference between rights infringement and fair use.
EPA MANDATE:
Memphis College of Art students and faculty are required to follow the standards detailed in the "EPA (Environmental Protection Agency) Materials Handling Protocols - September 2007"
-------------------------ASSIGNMENTS and REQUIREMENTS---------------------------
ATTENDANCE POLICY:
Being absent or tardy means that you miss out on valuable information needed to complete your projects.
Therefore, class attendance is mandatory. According to the MCA handbook you are allowed 2 absences (the equivalent of one week’s classes) due to illness or emergency. For every absence thereafter, your final grade will be lowered one letter grade. This means that if you miss six classes, you fail the course. There is no distinction between excused and unexcused absences.
Doctor’s excuses and notes from parents are not relevant. Six absences means too much information and work has been missed for a student to legitimately pass the course. I will take attendance at the beginning of class. If you are tardy, it is your responsibility to bring this to my attention at an appropriate time so that I may make the change in my attendance book. Do not interrupt the entire class to do so. Three tardies equals one absence. Not having the proper kind and amount of materials will result in an absence for that class.
In this course you will need to use class time efficiently. This means not leaving early, wandering in and out, or arriving late. Leaving class early constitutes an absence unless an arrangement has been worked out with me. Assignments will require additional time out of class to complete as well. Studio classes require 3 hours of outside work per week. Use class time wisely by working efficiently for the entire period and having all required materials. If you miss an assignment due to lateness or absence, take the initiative by checking the syllabus and/or getting it from another student. Notify me ahead of time if you will miss class that day. If you then have questions, email me, or come see me after class or during office hours.
TURNING IN ASSIGNMENTS:
Students are required to turn in assignments on time, on the blog and/or server, as instructed for each assignment. Any assignments that require printing must have their work printed before class, unless otherwise instructed. Failure to print assignments before class will result in that project being considered "Late," and subject to the same
penalties.
CLASS BLOG:
All assignments will be posted in full detail to the class blog, located at
http://fd170.blogspot.com. The blog will be updated/checked regularly, so students are free to reply to assignment postings with questions, comments and concerns.
STUDENT BLOG:
In addition, all students will be required to keep a personal blog along with the class blog. It will include your sketches, ideas for projects, lecture reviews, write-ups and final documentation for each assignment. It serves as a way to build a habit of creating a solid web presence in this digital age of art making, while allowing all of us to maintain contact with each other during the semester. Blog upkeep factors into your final grade: see below.
IN CLASS DISCUSSION, CRITIQUE, AND EXERCISES:
You will be expected to do original analysis of your work, as well as the work of your peers and professional artists. You will also complete in-class exercises illustrating the techniques presented. Extra time outside of class will be needed to master the skills and complete exercises presented in class.
VISITING ARTIST LECTURES:
You are required to attend 50% of these lectures and post a short review to your blog.
LEARNING ACCOMMODATIONS:
In compliance with MCA policy and equal access laws, I am available to discuss appropriate academic accommodations that you may require as a student with a disability. Request for academic accommodations need to be made during the first week of the semester, except for unusual circumstances, so arrangements can be made.
GRADING:
Each assignment will be awarded a grade based on the following rubric. Plus(+) and minus(-) will denote more or less intricate mastery of objectives.
A - Excellent. Assignment objectives are completed above and beyond the course requirements to great effort and great success. Technical and conceptual skills are on display in a masterfully coherent manner with clean craftsmanship.
B - Proficient. The assignment completed demonstrates most mastery of the skills presented, and objectives are completed beyond course goals. Much effort, and a clear and concise direction shines through the final result. There are still a few issues that can be pushed further.
C - Competent. The assignment completed demonstrates relative mastery of the skills presented, and objectives are completed to average sufficiency. Assignments are successful, and craftsmanship and technical skills are on display -- All are completed at an average level.
D - Deficient. The assignments completed are missing demonstrations of the skills presented, and/or required objectives have yet to be completed. There are conceptual and technical flaws and hurdles that have not been overcome.
F - Failure. The majority of the project is either not completed, and/or objectives for assignment are not met.
Final Grades will be based on a comprehensive average of all of your projects, as well as midterm and final milestones for blog upkeep.
*Your blog upkeep factors into your grades for each major assignment handled out of class.*
Assignments are due at 9a.m. on their scheduled dates. Loss of data, files, or other associated items needed for any assignment or project will require that you recreate your work, with no exceptions. You are solely responsible for the security of your files. Your files are not 100% secure on the server or computer. You should have multiple copies on multiple sources at all times. No files are safe unless backed up to 3 locations. (Example: Personal hard drive or flash drive, school network, personal computer, or web service. Note: you can store work on dropbox. we will discuss cloud storage.)
HEALTH and SAFETY PRECAUTIONS
As more and more work, education and recreation involves computers, everyone needs to be aware of the hazard of Repetitive Strain Injury to the hands and arms resulting from the use of computer keyboards and mice. This can be a serious and very painful condition that is far easier to prevent that cure once contracted, and can occur even in young physically fit individuals. Paul Marxhausen - visit his site below.
http://eeshop.unl.edu/rsi.html
http://www.mydailyyoga.com/yoga/rsi.html
DEPARTMENT AND LAB POLICIES:
Immediately submit an online tech request to report any problems with a lab computer or printer.
Main MCA computing info site = mcalabs.net -- go here for answers to frequently asked questions and online tutorials for MCA specific technologies.
No Food or Drinks in Lab.
Keep the Lab Clean. Dispose of all trash -- Paper scraps, old media etc.
Leave your workstation in an orderly fashion. All materials left on the desktop will be deleted. Organize files within the documents folder on your account. Delete your trash from your desktop and trash bin.
Back up work to an external source. Remember files are only safe if they exist in 3 separate locations. MCA servers are not to be considered secure and used only for temporary storage.
Log Out of your workstation prior to your departure. Upon your departure, the chair should be pushed in. Your monitor, keyboard and mouse should be placed in their proper positions.
TENTATIVE LIST OF SUBJECTS COVERED (subject to change)
Illustrator
WEEK 1
Introduction to Vector Graphics.
Vector Graphics vs. Raster Graphics.
Pen Tool, Brush Tool, and Paths in Illustrator
Curves, Angles, and Basic Shapes.
WEEK 2
Color Thoery and Basic Shapes.
Tonal Scale, Color Saturation, And the Histogram.
Bleed, Rulers and Margins for Printing.
Creating illustrations from basic shapes.
WEEK 3
Using the Pen tool to create advanced shapes.
Illustrator Effects: Gradients, 3D, and Drop Shadow
Compression and optimization.
Working with multiple Artboards, conceptualizing multiple iterations of an idea.
WEEK 4
Negative Space in design: Using the pathfinder tool.
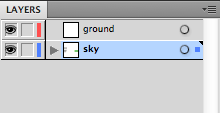
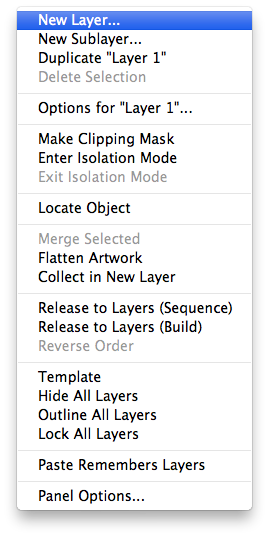
Working in Layers
Gestalt principles
WEEK 5
Typography and layout: (Movie: Helvetica)
Text and image
WEEK 6
Research and Recordkeeping: The art of Infographics.
The importance of time management; tracking your time in projects.
Photoshop
WEEK 7
Finalizing final Illustrator project; Introduction to photoshop.
Photoshop: Basic Tools And Raster Graphics.
Photoshop vs. Illustrator as an image-making tool.
WEEK 8
Editing and Photo-manipulation.
Searching for samples and using objects.
Creating photographic collages.
WEEK 9 (Midterm Week)
Working with Photoshop and Illustrator in tandem.
Grids in illustrator. (Differences and similarities to working in photoshop.)
Text and Image working in unison.
Full Color Pipelines: Photoshop for textures. Illustrator for lineart and text layout.
WEEK 10
Scanning into photoshop. Masking and alpha channels. Working with Symmetry and Asymmetry in image creation.
WEEK 11
Typographic Illustrations.
WEEK 12
Differences between Indesign, Photoshop, and Illustrator
Editing and Placing Images in Indesign.
Creating Covers and Manipulating .PDF files.
Indesign
WEEK 13
Digital Storytelling: Using Indesign to create multiple pages.
Creating Unity in Page Layout and Page Design
WEEK 14
Digital Arts and Storyteling (cont.)
WEEK 15 (Finals Week)
Creating a print portfolio: Final Due